 Hop Gardening
Welcome to the wonderful world of hop growing!
The hop (Humulus Lupulus) is a hardy, perennial plant that produces annual bines from a permanent root stock (crown). In hop gardening, it’s important to know that bine plants wrap their stems around a support structure in a helix pattern, different from vines with tendrils that cling to supports.
Bines may grow up to 25 feet in a single season but will die back to the crown each fall. In addition to the true roots and aerial bine, the crown also produces underground stems called rhizomes.
Rhizomes resemble roots but possess numerous buds and are used for vegetative propagation. Thus propagated, all plants of a given variety are genetically identical.
Hops are dioecious, which means they have separate male and female plants. Only the female produces flowers (cones) that are used for brewing or medicinal purposes. Male plants have no commercial value except to pollinate females.
Pollination stimulates higher yields by increasing cone size and seed set, but because brewers prefer seedless hops, males are only grown with otherwise poor-yielding female varieties. Therefore, hop seed from a pollinated female is only planted when a cross between the male and female is desired to obtain a new variety.
Hops are native to the temperate zones of the northern hemisphere. They are found wild in Western Europe, Asia, and certain parts of North America. Commercial hops generally grow between the 30th and 50th parallel north or south latitudes and at various altitudes. Therefore the ability to grow hops is usually not limited by your location on Earth.
The health of the bine is more dependent on the grower’s ability to provide proper growing conditions and care. Under good conditions, hops are a prolific bine, will produce from 1/2 to 2 pounds of dried flowers per plant, and will be a joy to grow and utilize.

Planting Hops
Start your hop garden in Spring, planting hop rhizomes about three feet apart in well-drained soil. Cover the rhizomes with loamy soil and a layer of mulch.
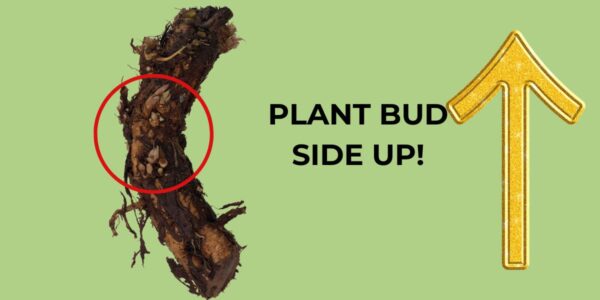
Upon obtaining rhizomes, they should be stored in a plastic bag, slightly moistened, and kept in a refrigerator until you are ready to plant.
The soil should be tilled to create a weed-free area. A strong support system is needed for the plant to climb on. Look for space along fences, garages, or property lines. Plant in early Spring once the threat of frost is gone, but no later than May. The soil should be worked into a fine, friable condition prior to planting.
In cold climates, you can plant rhizomes in pots and transplant them in June. Plant one rhizome per hill with the buds pointed up and covered with one inch of loose soil. Hills should be spaced at least three feet apart if the hills are of the same variety and five feet apart if they are different. In the first year, the hop plant requires frequent light watering.
For more tips and how to’s, check out the blogs & videos Dave created (located on the menu in the left sidebar).
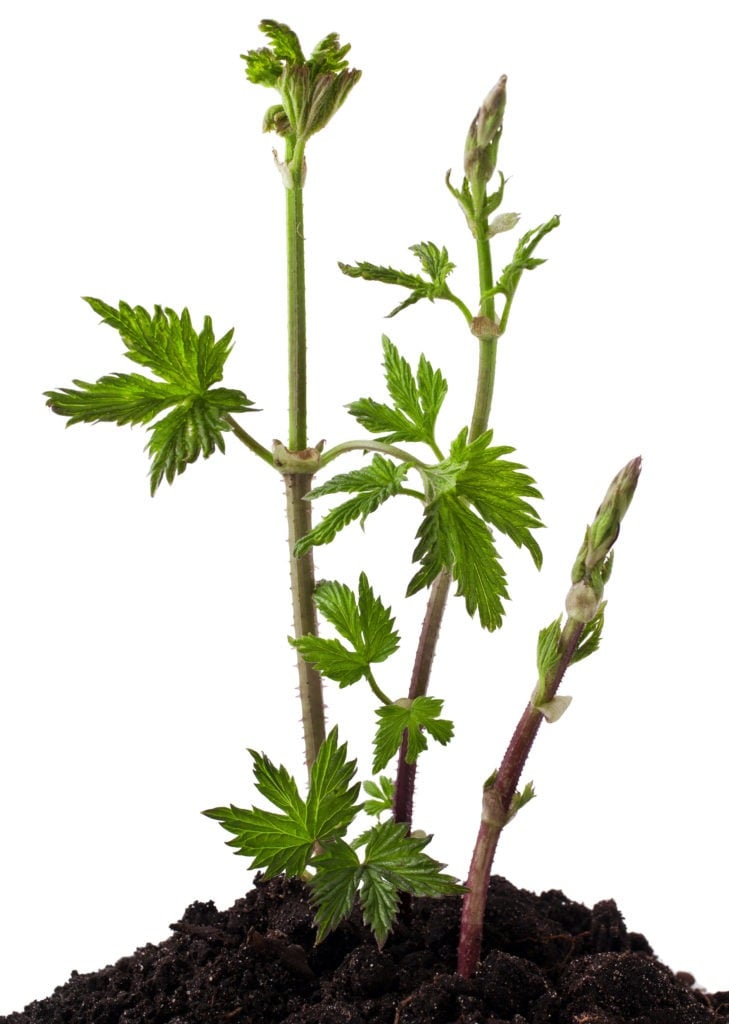
Early growth of hops plants. Photo: Farmer’s Almanac
Hops Growth Cycle
In this discussion of hop gardening cycles, I will be referring to the female of the hop species.
Being a perennial, the hop lays dormant during winter and is rather unaffected by freezing temperatures. The time of year when the annual bines break ground, when they flower, and when they die back is very much determined by local temperature and day length. The bine will not break ground until soil temperatures have risen to the point where most spring flowers appear.
A minimum of 120 frost-free days are required for the hop to fully ripen a crop of flowers. Once out of the ground, the bines need to be supported off of the ground. Vegetative growth continues until approximately mid-July, when most hops are either past bloom or in full bloom, depending on location and variety.
Hop is dioecious, producing male and female flowers on separate plants. The commercial hop is a female plant with flowers (burrs) produced on side arms that develop along the stem. Burrs develop into hop cones, which are sometimes called hops.
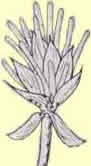
Illustration of a hop burr, which occurs before flowering
At this “burr” stage, the flower is approximately 1/4 inch in diameter and is composed of many florets whose styles give it a spiny appearance. This is when the flower is receptive to pollen, and if males are present, wind-borne pollen will fertilize the female flower and result in a seeded female hop cone.
Regardless of pollination, the styles eventually fall off, and miniature petals grow, which eventually results in a cone-like structure. Most female flowers develop and ripen predominately between mid-August and mid-September, depending on location, weather, and cultural practices. Commercial growers actually delay flowering by removing the earliest bines in the Spring in order to enhance regrowth and encourage a higher yield of flowers.
After the flowers ripen, the bine will continue to build reserves until it totally dies back with the first freezes of Fall.
Hops Production
When hop gardening, it’s key to learn that hops can produce such a large bine in a matter of months, that they will use a large amount of solar energy, water, and nutrients. It is not to say that the hop will not grow under less than optimum conditions, only that the bine will be smaller.
Hops prefer full sun and rich soil, preferably light-textured, well-drained soil with a pH of 6.5 – 8.0. If drainage is a problem, small mounds can be built using surrounding topsoil mixed with organic matter.
Since the hop is a perennial, it’s not a bad idea to dig holes about one foot deep so that some manure and other slow-release organic fertilizers can be mixed with your soil and replaced into the hole. This puts the nutrients in the root zone.
Rhizomes should be planted vertically with the bud pointing up or horizontally about 1″ below the soil surface. First-year hops have a minimal root system and require frequent short waterings, much like any baby plant, but do not drown it with too much water.
Mulching the soil surface with some organic matter works wonders in conserving moisture as well as helps control weeds. Once the hop is established after the first season, less frequent deep watering is best, preferably drip irrigation. Try not to soak the bine during watering, as that will sometimes encourage diseases.
Each Spring, apply a hearty dose of manure as a top dressing or fertilize with a balanced chemical fertilizer that is recommended for garden vegetables. Don’t expect very much growth or flowers in the first year because the hop is basically establishing its root system. Full growth and maximum crops of flowers will be achieved during the second+ year.
Pruning Hops
Do not prune baby hops. Let everything grow.
In hop gardening, timing your pruning efforts makes a difference. When the young bines are about 1 foot long in more mature hops, 3-4 bines are trained clockwise per string, which has been staked to the hill. It is common to run 2-3 strings per hill. The remaining weaker bines should be cut off at the ground so more energy can be focused on the trained bines.
Hops mainly grow vertically, but lateral side-arms extend from the main bine and produce flowers. The main concern is to support the bines and prevent side arms from tangling. Most cones are produced on the upper part of the plant.
In July, the lowest 4 feet of foliage and lateral branches can be removed to aid in air circulation and reduce disease development. The removal of lower leaves (stripping) must be done carefully to avoid breaking or kinking the main stem.
In August, allow additional bottom growth to remain to promote the hardiness of the crown and the plant vigor for next year.
At the end of the season, you can bury healthy bottom bines for propagating new plants the next spring. Simply bury the bines in a shallow trench and mark their location. In Spring, dig them up and cut them into pieces about 4 inches long. Make sure each new cutting has an eye or bud.
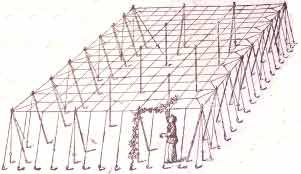
United States-style hop-growing setup
Hop Spacing and Support
Hop gardening involves knowing how far apart to plant your rhizomes and how to support the plant’s growth. Space between plants varies from country to country and is mainly based on the need to have enough room to allow tractors to get between the rows.
In the United States, hops are grown on a 7′ by 7′ grid with an 18-foot tall trellis. In a home garden, the main concern is just to get the bine off the ground and, if possible, to keep different varieties from getting tangled up with each other.
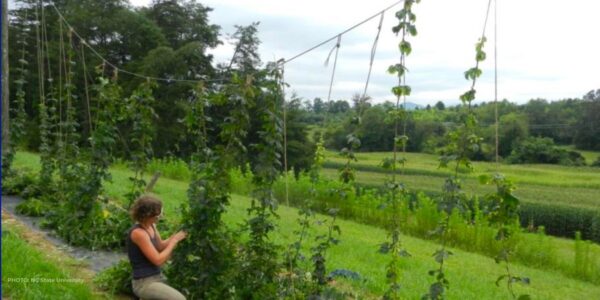
Home garden hop growing setup
Ideally, you should plant mixed varieties at least 5 ft. apart. Identical varieties can be as close as 3 ft. if you don’t have much room. Hops mainly grow upwards if they can, then lateral side arms extend off of the main vine.
Hops don’t have to be grown on an 18′ trellis. Some of the less vigorous varieties will yield more if they are limited to 10′ – 15′. Actually, just about anything over 6 feet will work, which means the bine will just become bushier.
The bines are easiest to grow and deal with if they are trained onto strong twine. This twine can be supported by a trellis wire, pole, tree branch, or building. Small diameter poles, lattice, and chain link fences also work but require more hand labor. Keep in mind that the bine does die back each Fall.
In the first year, bines can be established with a 6-foot stake. Commercial hop farmers do not train up the first shoots of spring but prune them off mechanically. Hardier shoots are trained onto the string about 4 weeks later (early to mid-May in Oregon). Only 2-3 bines should be trained onto each string with 2 strings per plant. All subsequent bines, which can be extensive with older plants, should be cut off.
Bines are ready to be trained when they are about 12″ long and must be gently wrapped clockwise onto the string without kinking. Once trained, the bine will take care of itself. If you want the bine to grow horizontally, you must do this manually.
19th-century low trellis
As early as the 19th century, a low trellis had been developed. It was constructed of iron cross pieces, old gas pipes, and wood. it was almost 2 meters (6′ 6″) high and had good wind resistance, but never became popular. Source: Hop Cultivation in Hallertau, by I. Kettner Mainburg, 1976 p. 134
Hops Harvesting
The fruit of your hop gardening efforts comes at harvest time. Because most hops are produced at the top part of the plant, most cones are out of reach from the ground, so it is safest to lower the bines in order to pick the hops. The harvest date varies with variety and location but will become evident as you gain experience as a hop grower.
At maturity, the hop aroma is at its strongest and is measured by crushing a cone and smelling it. The yellow lupulin glands in the cone become much more evident and plump looking when magnified. The cone will develop a drier, papery feel and, in some varieties, a lighter color as it matures. Some browning of the lower bracts is a good sign of ripeness.
Squeeze the cones as they develop, and you will notice they become more light and resilient rather than green and hard. The actual picking is self-explanatory, and this is where you want the flower cones, not the leaves. I don’t know why raw hop cones are occasionally called leaf hops when the idea is to not pick the leaves.
Hop harvesting with top wire rigged to be lowered. Photo: NCSU
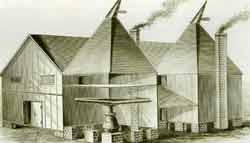
Turn of the century drying kilns. Image courtesy of The Hop Atlas 1994 by Heinrick J. Barth
Drying Hops
Drying your freshly grown hops can be done in a good dehydrator, custom-made hop dryer, or well-vented oven, or they can be air dried. If you use heat, the temperature should not exceed 140 degrees F. Using cooler temperatures may take longer, but you obtain a higher-quality hop.
Under dry weather conditions, I suggest taking a window screen from your house and setting it up in a wind-protected area, elevated on each end. Spread the hops as shallowly as possible and fluff daily so moist inner cones are brought to the outside of the pile. If the weather is dry and the pile is not too thick, they will dry in about three days. A high moisture content in the cones will adversely affect storability and recipe formulation.
The hops are dry when the inner stem of the cone (strig) is brittle and breaks rather than bends. The strig takes much longer to dry than the bracts, so be patient.
Pack the hops in an airtight container and store them in a freezer until you’re ready to brew. I prefer using vacuum sealers for preservation when I send out my hops.
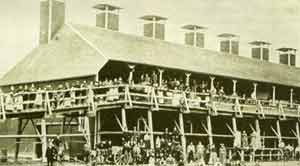
19th-century storage. Image courtesy of The Hop Atlas 1994 by Heinrick J. Barth
Hop Diseases and Pests
Hop gardening isn’t always carefree as plants can attract bugs and develop diseases. Most of the pests and diseases impacting hops have humuli in their Latin name. This means they are specific problems on hops and do not infect or inhabit other plants.
So if hops do not have a history of growing near your location, these problems will hopefully not exist in your area. Don’t let the potential problems of growing hops stop you any more than the potential of brewing a bad batch of beer.
Understand more about your hop gardening challenges. Click here for the full information – Freshops Insect and Disease Guide.